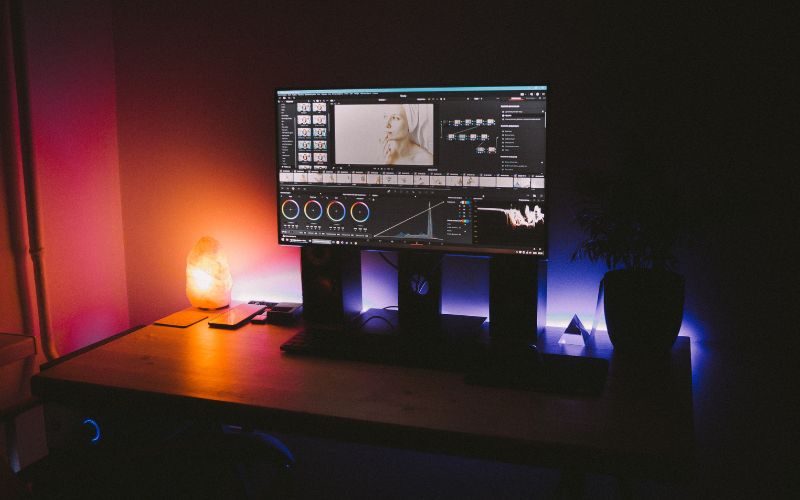
If you’re a creator on a budget, DaVinci Resolve audio editing software is some of the best around. It offers advanced editing features on par with what you’d get in other paid-for editors, but there’s a version available for zero dollars and zero cents. You get some upgrades in the paid Studio version, but the free version has a lot to offer.
DaVinci Resolve’s roots in Hollywood color grading means it has some world-class features for video, but don’t think for one second that it treats audio as a second-class citizen. Resolve can handle any audio-related tasks you can throw at it, especially if you follow these tips.
1. Get your levels perfect every time
If you’re creating video with music for YouTube – and let’s be honest, almost everything ends up on YouTube these days – getting your audio levels right is important. You want your video to stand out, but if it’s too loud it’s the only thing viewers will notice (and maybe not in a good way). If it’s too quiet, they’ll click away before you get a chance to tell your story.
Adjusting volume is super easy in DaVinci Resolve. Just bring your mouse over the audio in the timeline and click and drag the horizontal line in the middle. Drag it up to increase the volume and down to decrease. That said, there’s an even easier way.
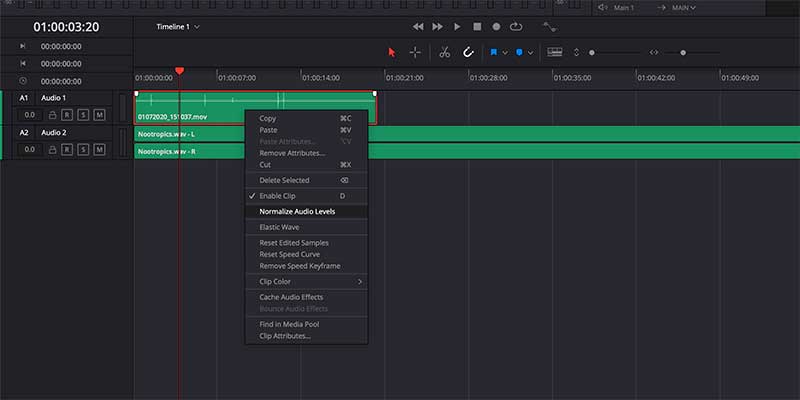
Right click on the audio track, then select Normalize Audio Levels. This can automatically bring low-level audio tracks up to a standard volume – neat right?
2. Master the fade
Smooth audio transitions go a long way toward making your video sound as professional as it looks. However, unlike video, there are only a few ways to transition audio, usually hard cuts and fades. In almost every case, you’ll be better off with fades.
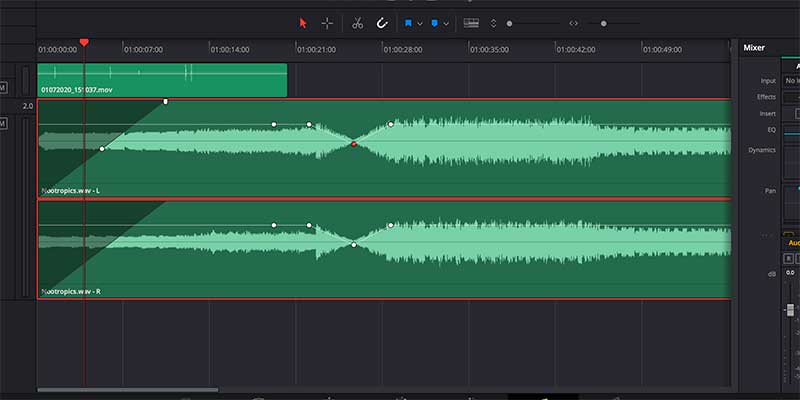
Crossfading audio in DaVinci Resolve is simple. To fade between two clips, drag the crossfade transition over the area where the two clips meet. You can also hit T to apply the default transition at the current edit point.
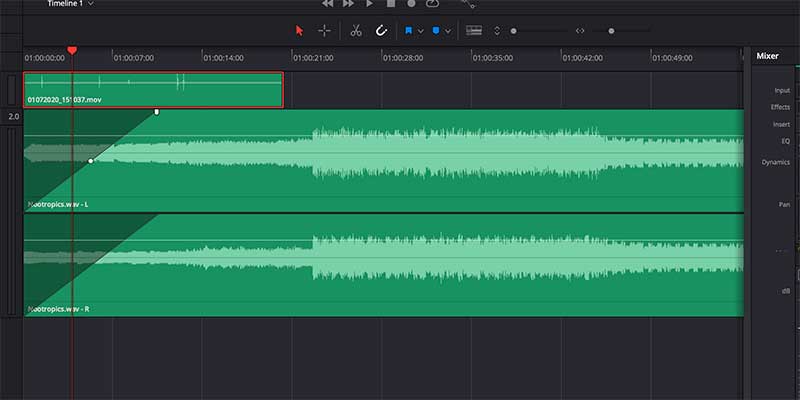
To fade in and out, you don’t even need a transition effect. Look at the audio tracks and you’ll see little white handle icons at the start and end of each clip. Click and drag these inward to form a slope. At the start of a clip, this will fade audio in. At the end of a clip, this will fade audio out.
3. Need more control? Use audio keyframes
Sometimes, changing levels or simple fades just aren’t enough. Maybe you want to have an epic swell in the volume of the music at a key point in your video, or maybe you just have a clip where the levels rise and fall. Either way, DaVinci Resolve audio editing software can handle this.
Using audio keyframes, you can control the exact volume of a given track in the timeline throughout its duration. Simply hold down either the Alt or Option key and click on the audio track to add a keyframe. You can add as many of these as you want, so don’t feel like you have to be stingy.
With these keyframes, you can quiet down a certain part of the track or raise its volume. You can use these for simple adjustments or complex automation of track volumes. How much or how little you use it is up to you.
4. Keep the good noise, get rid of the bad
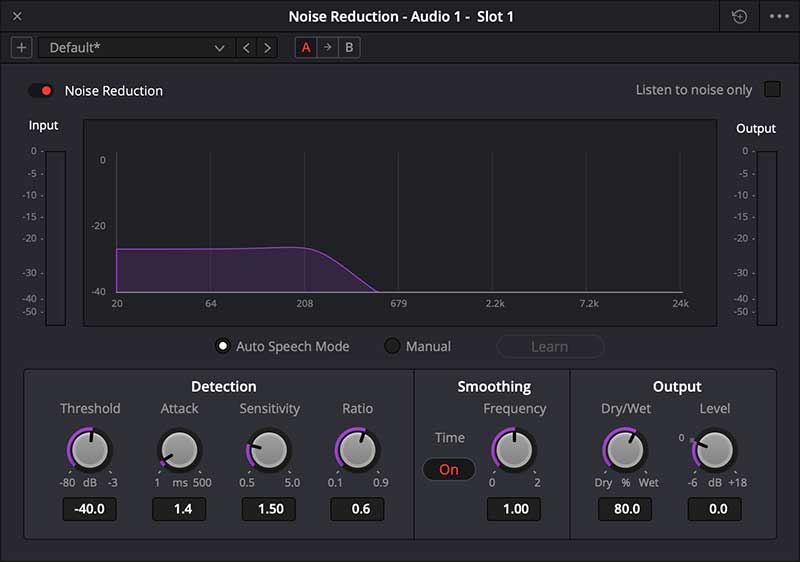
Some Creators have the luxury of capturing video in sound-controlled recording studios where noise isn’t an issue, but a perfect studio setting isn’t always an option. If you’ve got video that was captured in a noisy environment, heavy background noise can be distracting and frustrating for your viewers. With DaVinci Resolve, you can easily get rid of it.
First, open the audio mixer on the right-hand side of the DaVinci Resolve audio editing window. Hit the plus sign, then Fairlight FX, then select Noise Reduction from the list that pops up. Repeat for any other tracks that need noise reduction.
Auto Speed Mode makes dialog or other voices easier to hear, automatically reducing other background noise. If you need more control over what noise is removed, select Manual mode and try tweaking. In the worst case, just remove the plugin, then re-add it and try again.
5. Don’t skimp on the music
Everything is better with music, no matter what it is. This applies for videos as well. Your video could be the most exciting thing in the world and just a few steps away from perfect, but it’ll be better with the right music.
Notice the emphasis on ‘right’. Using generic music just to avoid copyright claims on YouTube isn’t going to take your content from zero to hero. If you really want to connect to your audience, using well-known tracks that illustrate the point you’re making in the video can really help.
This music is most likely going to be from famous artists that will definitely be copyright protected. Fortunately, music licensing platform, Lickd has a huge library of commercial music that is meant for creators to use. TLDR: Lickd offers you chart music that you can use without getting a copyright claim or losing your ad revenue.
This isn’t any cheapskate soundalike music either. Lickd has real songs you recognize, and so will your viewers. Now there’s no excuse for having anything but the best music in your videos. Plus, you even get 25% off your first track!
Now that you know your way around DaVinci Resolve’s powerful audio editing tools for video, go forth and create! For more ways to make sure your videos sound as good as they can, check out the Lickd audio editing tutorial channel.
Related articles

How to successfully remove background noise from audio
There’s nothing worse than nailing the perfect recording, only to play it back and realize…
The best audio editor for online video content
Nothing will get people clicking away from your video faster than bad audio. That’s why…