Have you been wondering how some content creators master the art of video transitions?
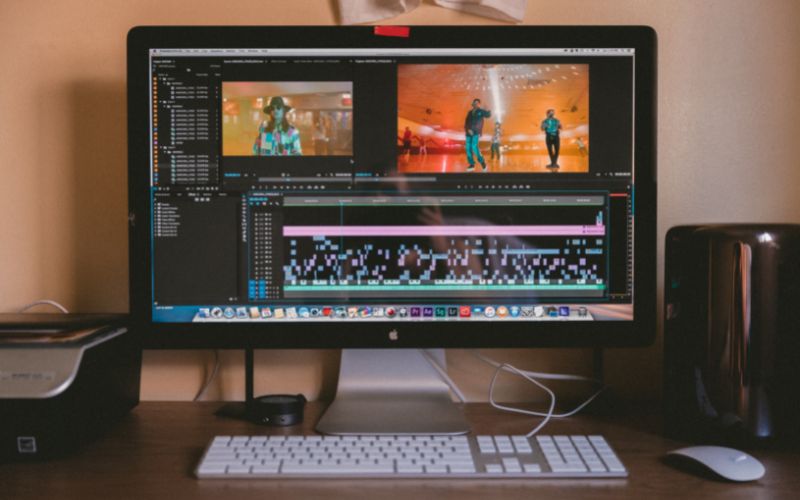
Transitions in video content are short effects between one scene and another. They can be notoriously hard to pull off but when done seamlessly they can look seriously impressive.
We’ve compiled our own in-depth research and looked at successful YouTubers to put together our top tips for creating spectacular transitions for content creators to use in their videos.
Video transitions for Youtube and social media channels are becoming increasingly popular among content creators.
Knowing how to execute the perfect transitions for video output is now an essential component in video-editing and sharing, whether you’re creating a vlog, tutorial or a viral post – a snazzy transition will help build your expertise while wowing your audience.
To create impressive video content, here are the best video transitions to learn:
1. Whip pan
The whip pan or tilt is the perfect transition for creating a fast, energized switch in content. We recommend pre-deciding this transition as part of the shoot by simply panning from one scene to another in a fast-paced motion – this will allow you to bury an edit in a flawless fashion.
2. Glitch
One of the most popular transitional effects is the glitch, which is a smooth way to chaotically blend two shots to achieve a futuristic effect. Creating a glitch can be done in multiple ways, but the majority of creators enjoy warping the frame and disrupting the sound levels. The glitch effect is often found in many video editing platforms, but if you wanted a further challenge, you could create your own.
3. Fade in and Out
A timeless transition for many reasons, the fade in and out is an easy transition to master to keep your shots looking seamless. Equally, it’s a useful transition if you’re wanting a slower switch in frame. Simply fade and dissolve and choose the desired speed for your edit. Alternatively, adding colours to your fade, such as black, can help you transition smoothly without having the frame on screen.
4. Hand over Lens
This transition is often used in viral content, with it being a simple yet effective way to slide into the next frame. All you need to do is cover your lens with your hand in a quick motion after you’ve finished shooting your first frame, before beginning your next frame by moving your hand away from the camera. Edit both frames together, and you’ve pre-shot a seamless transition.
5. Zoom
For a slick switch in frame, opt for a zoom transition. Whether you’re wanting to zoom out of a close-up to a wide shot, or zoom in on a wide shot, simply warp the edges of your shot and reverse this effect on the second frame to add speed to your edit.
6. Shapes
Overlaying your frame with funky shapes or lines can add vibrancy to your transitions, particularly if you’re using brand or artist colors; this is an effective way to use a pop of color in your edits and grab the attention of your viewer. You can experiment with an array of shapes and outlines by keeping it simplistic or adding multiple at once.
7. Evaporation
A similar edit to the classic fade in and out, but slightly more experimental – the evaporation transition can merge two frames together seamlessly. This transition can be toyed with depending on how quickly you want your frame to evaporate and disappear. For example, you could start slowing with the corners of the frame, or start in one corner, or focus on one point in the shot, or you could evaporate the entire frame at once. Whatever dynamic you choose, it’s designed to give you a smooth, easy edit.
8. Wipe
For a retro feel, the wipe transition is an easy classic to master in your editing, simply wipe from one frame to another. This doesn’t have to just be from side to side however; you can get creative with the wipe by using a clock motion, wiping vertically or diagonally, or using shapes as a form to wipe. Adjust the speeds too if you’re looking to mix this one up in your videos.
9. Spin
This one is pretty self-explanatory, but the spin is another transition to add high energyd to your edits. Again, depending on the speed of your spin, you can increase the energy levels or opt for a slower switch in frame. This transition looks particularly seamless if you’re changing one thing in the frame. For example, filming a model in a pair of jeans and spinning to the next outfit.
10. Blur
Another seamless transition to opt for is the blur, which is an extremely effective and easy way to change shots. Simply blur the image at the end of the frame, and fade in with the second frame. You can change the speeds on the blur too, depending on how quickly you want to change frames.
Whatever transitions that you decide to use for your videos, it’s also important to choose a great song to go with it. At Lickd, you can search through 150,000 pre-cleared tracks from the biggest artists and license them for your videos with YouTube, Instagram, and music for Facebook. We work directly with the rights owners to keep licensing prices low.
We hope this article was insightful and has given you the inspiration to start trying your own transitions in your YouTube videos. Let us know by sharing this article on Facebook or Twitter using the social share buttons below, don’t forget to tag us and let us know if you found it useful or if there are any other transitions you think should be included on this list.
Now you know all about transitions for YouTube videos. But, what is Lickd?
Lickd offers mainstream music that will give your YouTube videos a leg up on the competition, helping you grow and monetize your channel. Yep you’re not imagining that, we said mainstream music! And no, you won’t have to worry about copyright claims or losing your ad revenue. Plus, you get 25% off your first mainstream track! If you’re ready to start taking your YouTube videos up a notch, sign up today and start feeling the magic. And if you need stock music, don’t worry we have the biggest library of stock music for creators too which you can get for free for 14 days.
Related articles
The Best Cameras For YouTube Content Creators
When it comes to content creation on YouTube, the quality of your videos is a…

How to join the YouTube Partner Program: requirements explained
YouTube remains one of the most popular platforms for content creators. Not only is it…