
There’s nothing worse than nailing the perfect recording, only to play it back and realize it’s full of background noise. It can take hours to prep your music for YouTube videos or Insta story, and it’s hella annoying when a background hum or buzz wreaks havoc with the quality of your audio. But that’s no reason to send it to the trash bin!
In this article, we’ll show you how to successfully remove background noise from audio, with pro tips to make your recordings sound clean and crisp. We’ll cover a whole range of different audio softwares, if your software of choice isn’t mentioned, try checking our audio editing tutorial channel for an even bigger collection of helpful videos.
The basics
When it comes to recording crystal clear audio, the setting is as important as the software you’re using. It goes without saying: record your audio in a quiet environment and remove any noise offenders from the equation. That could mean fans, fridges, laptops, loud roommates – or the sounds from an open window. The cleaner your source recording, the crisper the final sound.
The perfect setup
Signal to noise ratio is the measurement of signal strength compared with background noise. Put simply, this means being close to the microphone, ensuring the audio signal is as strong as possible without any clipping (waveform distortion). Always use headphones to get a better idea of the sounds in the room.
Let’s dive in to how to do this on each main editing program below. However, there are also free tools out there to remove audio from video if you haven’t invested in any software yet.
How to remove background noise from audio in Final Cut Pro
First things first, observe the audio channel to see what’s happening in your real-life recording space. Background sound will appear as a noise curve, plotted on the audio input bar.

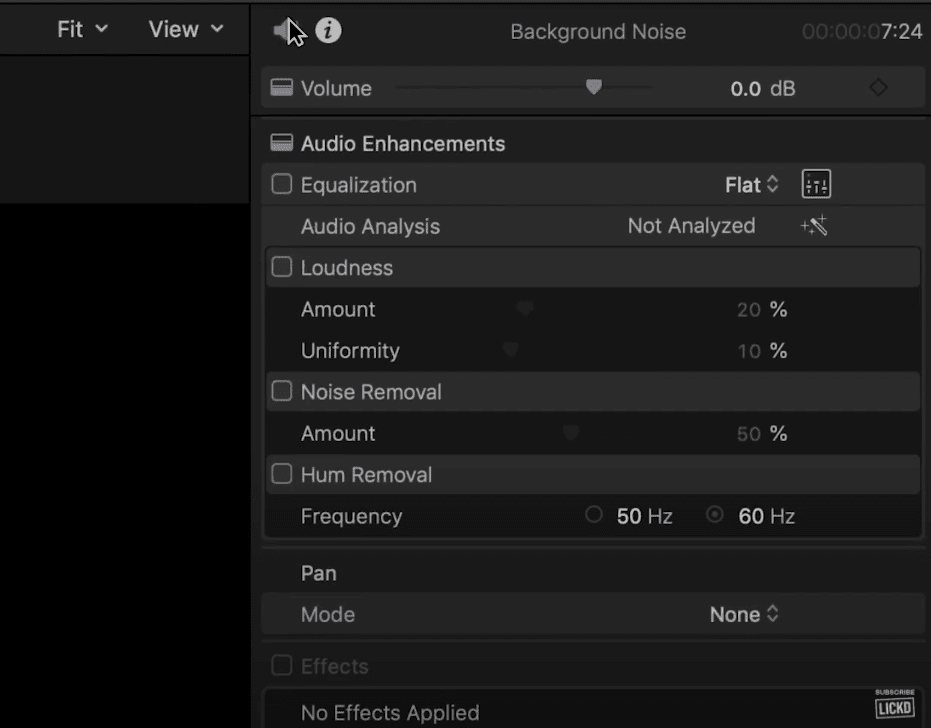
Then, click the blue audio icon in the top-right corner. This is the audio inspector, where you’ll find the settings you’ll need to optimize your audio. Click the box called ‘Audio Removal’.
This will turn on noise removal, with a handy cursor that allows you to edit the amount of audio removal from 0-100. Sounds simple, right?
For the best results, it’s important to remember that there’s a fine line between dialogue clarity (the crispness of the sound) and overdoing it with a high amount of audio removal. Usually, this makes the audio distorted and can sound a bit like it’s underwater.
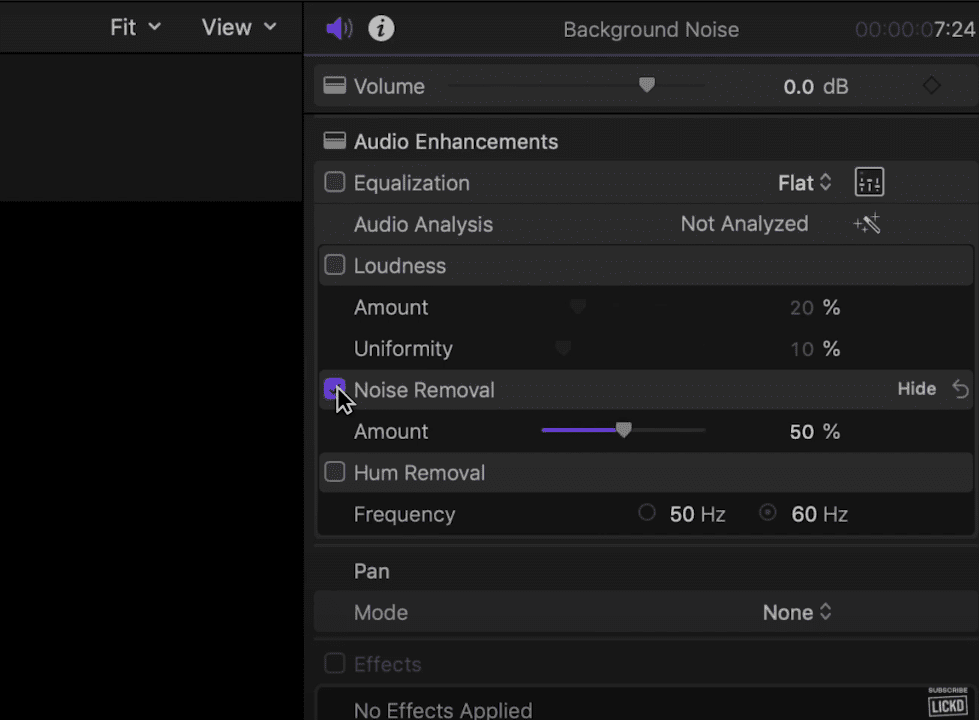
The automatic preset is 50%, and it’s best to keep it in the mid-line, so the recording sounds totally natural – but without any of the unwanted fuzz.
Let audio expert Dan Pugsley walk you through it in our exclusive YouTube tutorial.
How to remove background noise from audio in DaVinci Resolve
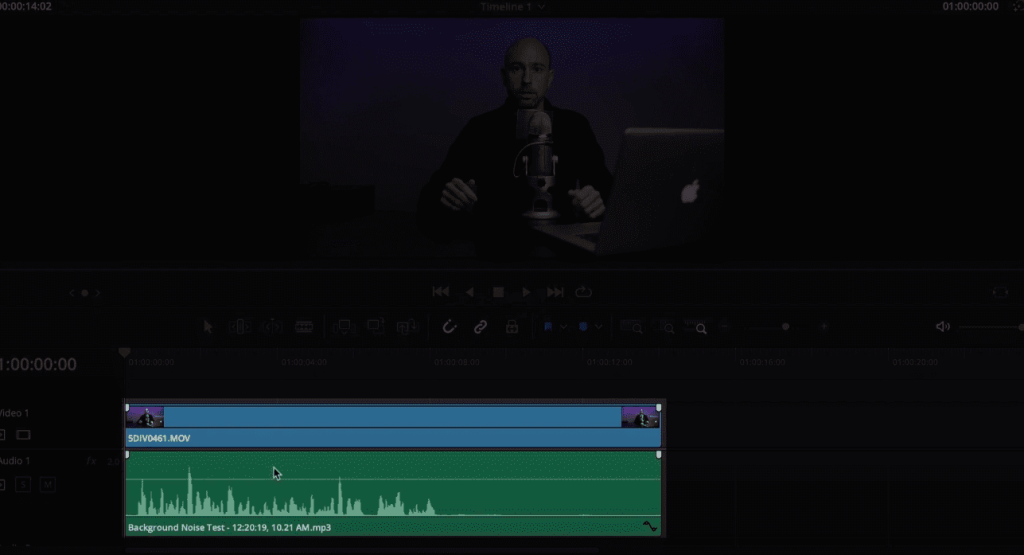
First, make a recording of the room and add the audio clip to your timeline. Then, you can hear what background noise you’re dealing with – and you know exactly what to remove.
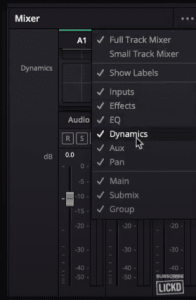
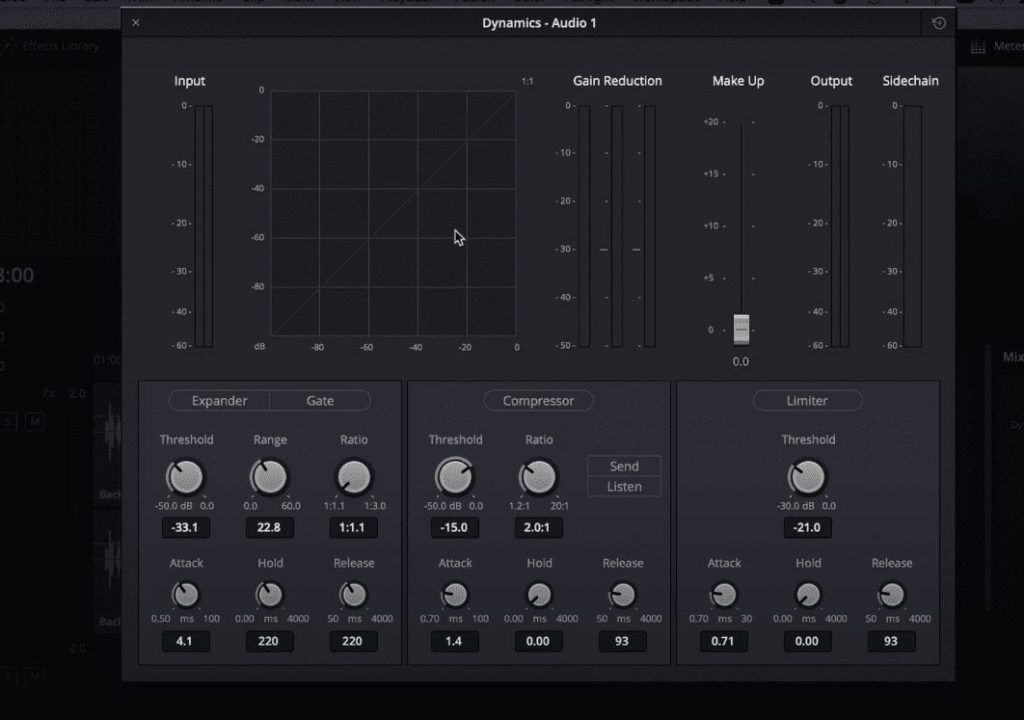
Click the fairlight tab (the music symbol in green) in the lower utility bar. Next, add an audio gate, which controls when and to what degree audio passes through a channel. Open up the mixer, locate your audio track and then tap ‘Dynamics.’ Double-click to get to the Dynamics board.
Click ‘Gate.’ The vertical line represents the threshold, meaning the point at which DaVinci Resolve starts to lower the volume of your clip. The range illustrates the minimum decibel to the highest decibel, once it’s passed the threshold.
Boost the threshold to around 33, playback on the timeline, and check the output bar. Then, find the section of the clip where there’s no talking, only background noise. See where this falls on the input measure, and adjust the threshold and range accordingly. After a bit of experimentation, you’ll be able to hear the difference.
Next up, noise reduction. Head back to the mixer desk, and select ‘Noise Reduction’.
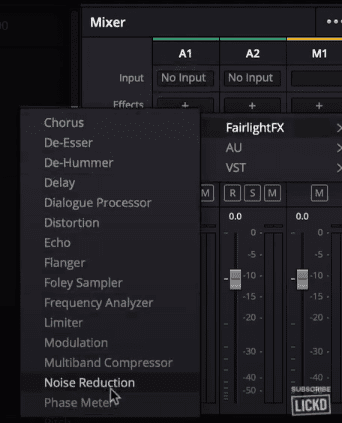
The ‘Auto Speech Mode’ is an easy way to remove the background noise, but it can result in audio sounding too high-pitched. Instead, tap the ‘Learn’ button, find a spot in your clip where it’s just background sound and the software will identify the frequency, automatically reducing the unwanted noise.

For more expert tips, check out the full background noise removal tutorial on YouTube.
How to remove background noise from audio in Vegas Pro
If you’re looking to remove background noise from your audio in Vegas Pro, the software has a few tricks up its sleeve.
Firstly, click the FX button on the audio timeline. This brings up a bunch of audio-enhancing options, but the one you want is ‘Express Audio Restoration’.
Press ‘Add’ and then ‘Okay’. You’ll come across a box of presets, but it’s worth customizing these to get the best from your audio recording.
You’ll come across these options:
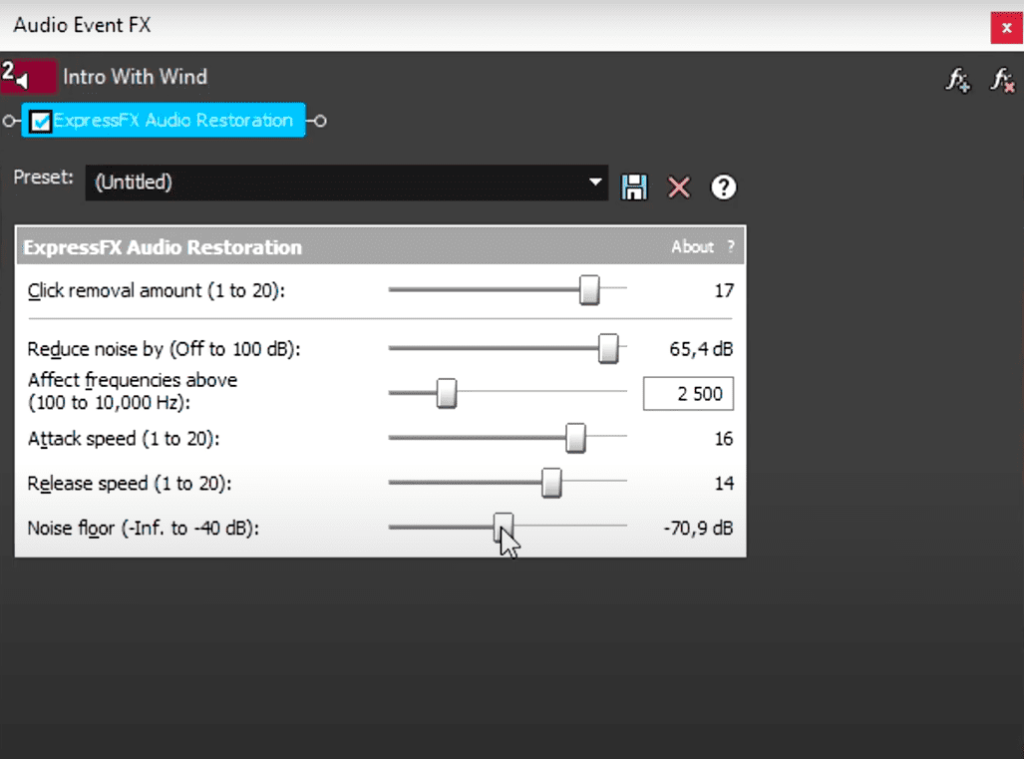
Each setting uniquely affects the recording; have a play around to find what really works for your audio.
However faultless your audio (especially voice recordings,) it’ll never sound in complete isolation. In other words, unless you own high-spec studio equipment, it’s virtually impossible to erase all of the background noise.
That’s why it’s a great idea to incorporate music into your video, especially when you can find genuine chart music to compliment the vibe you’re going for with your content. Check out the latest music on Lickd for real music from real artists. The first song’s on us.
For a full walk-through of how to remove background noise in Final Cut Pro, check out this Lickd YouTube tutorial.
How to remove background noise in Adobe Audition CC
You can’t always record in a perfect studio setting, and if you’re battling with background noise, Adobe Audition CC offers a range of awesome features to help improve sound quality.
Click ‘Effects’ on the toolbar and select ‘Denoise.’ This brings up a slider with a range of 0-100 percent. As you fade it up and down, tune into the quality of the audio – instantly better, right?
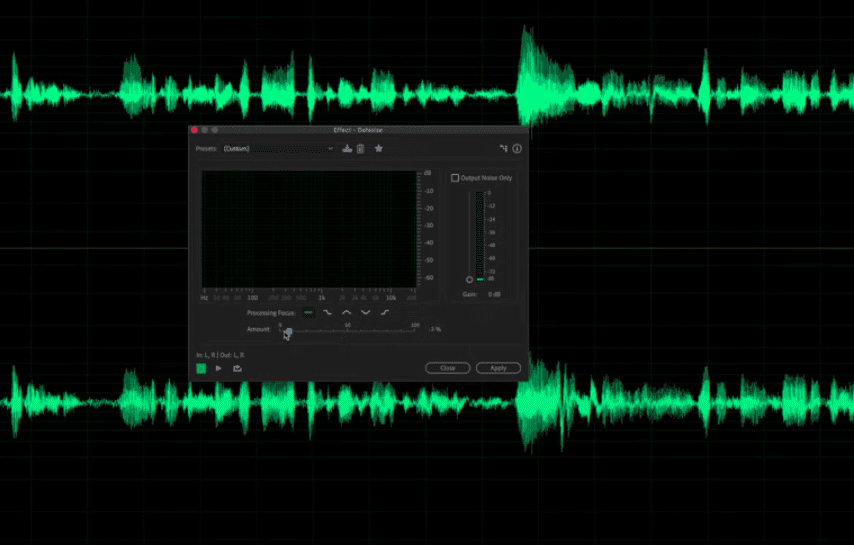
If you want to go one step further, select ‘Processing Focus’ to edit the frequencies. For an in-depth guide to mastering different frequencies, check out our YouTube tutorial with audio pro, Mike Russell.
How to remove background noise in Adobe Premiere Pro
Background noise is easily solved in Adobe Premiere Pro. Go to the audio workspace, select your track, and choose effects. Hover over ‘Filter and EQ’ and pick ‘Parametric Equalizer’ from the menu bar.
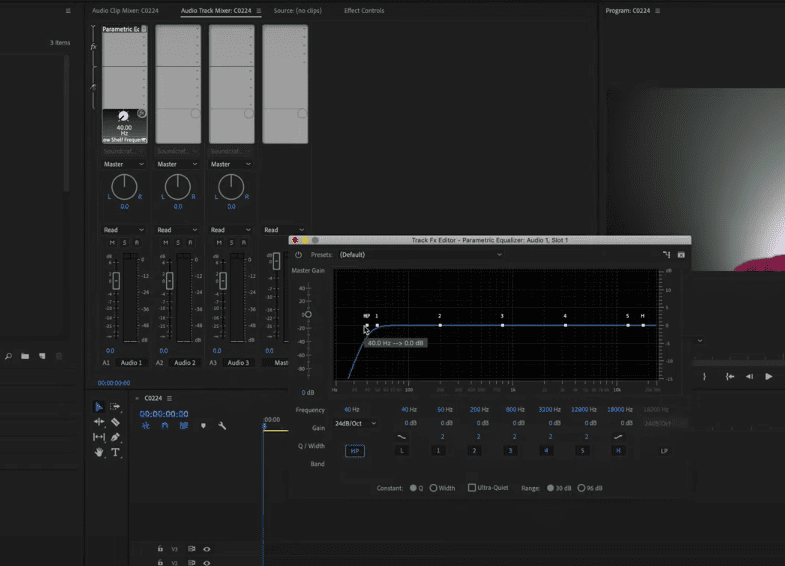
Double-click the ‘Parametric Equalizer’ in your clip. Drag the high pass filter (HP) on the equalizer – the more you drag it, the more the hum will disappear. With it off, there’s lots of background fuzz. Pushed to the max, it sounds way too high-pitched. Ideally, you want a voice recording to be around 100-120 Hertz.
If you want to make your audio sound even crisper, you’ll want to use the ‘Denoise’ effect. To see how it’s done, tune into this Lickd tutorial.
Who is Lickd anyway?
Lickd gives you access to the biggest tracks from the best artists at low prices. This means you can embellish your videos with the latest chart-toppers without having to worry about breaching copyright or paying a big bill.
When you sign up for Lickd, you’ll be able to search well-known, lyric-filled songs by genre, length, mood, and more. Plus, if you sign up today, you get 25% off your first track!
Related articles
The best audio editor for online video content
Nothing will get people clicking away from your video faster than bad audio. That’s why…
How to edit audio in After Effects – 5 skills every Creator must know
Adobe After Effects is the tool of choice for video pros looking to create visual…